
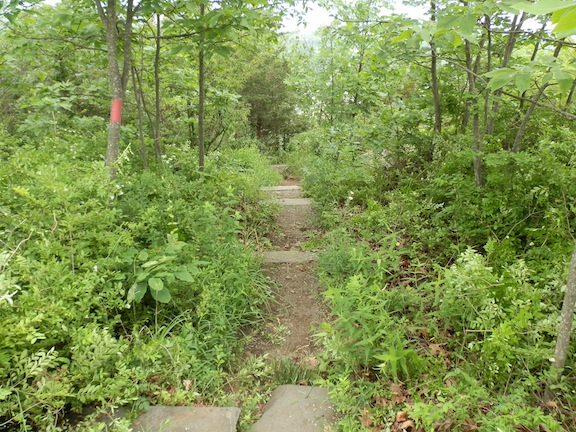
This picture shows the Yellow Trail reopened in May 2018 after it was blocked by the crown of a red oak tree. Two volunteers using hand tools needed to work for 90 minutes because there were so many cuts to make. |
What is Involved With Trail Maintenance?
This guide answers that question with information as it directly applies to West Rock Ridge State Park, but this information can be used by people wondering how they can maintain trails in other areas.
Roles
I have been a Volunteer Trails Manager at West Rock Ridge State Park since 2007, and a Department of Energy and Environmental Protection (DEEP) Adopt A Park Volunteer at the park since 2012. I have been Trail Manager for the Regicides, Sanford Feeder, and Westville Feeder Trails at West Rock, on behalf of the Connecticut Forest and Park Association (CFPA), since 2011.
I also headed up an effort in 2015-2016 to blaze the trails at the Naugatuck State Forest, West Block, in Beacon Falls, Oxford and Naugatuck, bringing structure to an area that previously had mostly unblazed trails.
I was a Trail Ambassador for the New England Mountain Biking Association (NEMBA) from 2010 to 2019. I appreciated the knowledge I gained from NEMBA about building sustainable trails that flow with the contours of the land, rather than the more historic method of building trails that went straight up a hill and quickly became eroded.
I also have put into practice the NEMBA actions to address a wet section of trail, which is a menu of options from least to most sustainable. The first option is to harden the trail by using rocks and gravel. If this is not possible at that location, then the second choice is to move the trail to drier ground. If the trail cannot be relocated, then build a boardwalk to raise the trail above the damp section. Building a structure is the least desirable option because it will eventually need to be replaced.
I did not renew my NEMBA membership for two reasons. First, NEMBA’s focus seems to be to build, build, and build. While some new trail construction may be warranted, my efforts have been directed toward improving existing trails. My other philosophical difference is the practice of building wiggly trails that blanket an area, but which don't actually go anywhere. I called these “wet spaghetti trails” because they appear as if someone dropped wet spaghetti onto a map with the lines looping back and forth.
One concern about any kind of trail is that they affect the behavior of nearby animals because being near people is stressful for them, so any outdoors area needs to leave places for animals to live.
Training and Experience
I learned about trail maintenance through a workshop conducted by the International Mountain Biking Association (IMBA), which was hosted by NEMBA. I have also attended workshops sponsored by the CFPA and the Appalachian Mountain Club (AMC). I have read books on trail maintenance from the AMC and the National Park Service (titles under Resources) and watched a park service video on trail maintenance.
From 2007 to 2025, I have spent 3,145 hours maintaining 27 miles of trails and 7.5 miles of the woods along the roads at West Rock, plus had help from others to offer another 2,220 hours worth of assistance. All my work is done with the permission and under the guidance of the park supervisor.
During that time, I have established blazing on trails that were formerly unblazed, and kept all trails blazed on a five to six year cycle. Trails are kept clear through annual pruning, and sometimes even more frequently. I have made various trail connections that did not exist before. I created short sections of new trails on Purple-Orange and Red and extended the Purple Trail to complete trail connections. I relocated four sections of the Regicides Trail to improve the experience of hikers. We built boardwalks and bridges on the White Trail to keep hikers above muddy areas and streams, and relocated two sections of the White Trail to higher, drier ground.
In 2010, I established blazing on what is now the Yellow Trail at the Naugatuck State Forest, Mount Sanford Block, Hamden, and also reblazed the White Trail. In 2015, I reblazed both trails in the forest. As I reblazed, I also pruned back the trails.
As noted above, in 2015-16, I established blazes on trails at the Naugatuck State Forest, West Block, blazing and pruning back about 20 miles of trails. I spent about 100 hours on this project with help from others who contributed 60 hours worth of work. Most trails in the forest were previously unblazed and those that were blazed were so faded it was hard to follow them. I worked with the forester on both projects in the two sections of the Naugatuck State Forest. In 2019-2019, the focus shifted to opening up the trails, many of which were blocked from trees knocked down by a tornado. I put in 120 hours, while others helped out for 45 hours.
I have helped the AMC on a few work parties on the Appalachian Trail. I have occasionally assisted CFPA on work parties on its trails, including the Aspetuck and Saugatuck Trails. I have helped NEMBA on a few work parties, including Huntington State Park in Redding and the Pequonnock Valley in Trumbull.
I became involved with trail maintenance as my way of giving back to the trails I enjoy hiking. Trail maintenance is a great, full-body workout that also has mental benefits. I feel good knowing I am making a positive contribution to the world that benefits others.
This snapped red oak along the Red-White Trail by Farm Brook Reservoir was cleared by a volunteer with a chainsaw in July 2018. Clearing this by handsaw would not be practical due to the size of the tree and the number of cuts required. |
Blazing
Trails need to be marked with paint, or signs, which is called blazing the trail. Painted blazes on trees can typically last about five years before they need to be repainted. Painted rocks last about two years. In some areas maintainers use small plastic, metal, or wooden markers that are nailed into the tree or a post. The ones nailed into a tree need to have the nails reset about every five years, otherwise the tree will grow around the nails and marker.
There are different styles of blazes. I use the system from the CFPA, which uses blazes that are six inches high by two inches wide. If the trail has more than one color, then I use a four-inch main color as the top part of the blaze and the second color is a two-inch blaze directly underneath that. A two-part blaze is easier to see and much easier to paint than to use a blaze with a dot in the middle.
Some trail systems will use different shape blazes with the same color. The problem is that as trees grow a circle, square and triangle all start to look like each other.
Blazes should be placed so that when a trail user is by one blaze, they can see the next blaze. At a turn, there are two blazes with the top blaze off to the left for a left turn, or off to the right for a right turn. At the end of the trail, two blazes are stacked like an equals sign.
In some trail locations, people do a poor job blazing. They will paint too many trees, a practice called “fence posting” because it looks like someone painted a bunch of fence posts all lined up. They may also paint extra large blazes, or use super bright paint, all of which are obnoxious to see and take away from the natural experience of being in the woods.
I do all the blazing at West Rock because I want to make sure it is done right and I want to keep it consistent. The exceptions are the Old Oak Nature Trail, maintained by Common Ground High School, the Solar Youth Trail, maintained by Solar Youth, and the single-track trail maintained by the NEMBA volunteers who constructed it.
 |
| The White and Purple Trail briefly overlap in this section. I purposely took this picture with the white blazes half repainted to show the contrast between an older blaze and a fresh one. White blazes seem to turn greenish after about three years, a problem I have not seen with other colors. This is a black birch tree, which is not the best for blazing due to its thin, rough bark. The offset, double blazes indicate both trails turn left at this point. |
Painted Blazes vs. Nailed Markers
Some users may wonder why not use metal or plastic markers, which may seem more permanent. In reality, they are just as much work, if not more work than blazing. Markers are typically nailed into trees and about every five years, those nails need to be backed out, otherwise the tree will eventually "eat" the nail and marker. These markers are typically installed with aluminum nails which are hard to nail into a tree without bending them. Aluminum nails are used because steel nails are a threat to someone cutting the tree with a chainsaw and it is easy enough for a nail to get surrounded by the tree over time.
A big concern with markers is that they are easily vandalized, as a miscreant can remove them and possibly even move them to an off-trail location. I have heard of this happening on the Metacomet Trail at Hubbard Park in Meriden.
One problem I have seen myself is at the Naugatuck State Forest, West Block where the state marked some trails north of Spruce Brook Road with reflective metal markers as a way of defining the trail to make it easier to follow in case of a forest fire. The marker along Spruce Brook Road was missing, making it difficult to locate the start of the trail. I moved one from along the trail where there was enough coverage from other markers to the trailhead, so people could find the trail. (I did not have the option of getting new markers from the state, so I worked with what was available). The next time I went back, that marker was missing too. In response, I blazed the trail. While I have seen people occasionally mess with blazes by painting over them, writing their names on them, or carving their initials into them, or even cutting off the bark of a tree (thankfully this last one is very rare), in general, blazes are much less likely to encounter problems than markers.
Nailed markers are useful in areas where there are mostly cedar trees because cedar trees have bark that peels easily, taking the blaze with it. As a bonus, cedar trees grow slowly, so it takes longer for them to catch up to the nail. Further, cedar trees are a soft wood, so it is easier to hammer in an aluminum nail, as compared to hardwood like an oak or maple tree.
 |
This photo shows a trail marker in another trail system that needs to be replaced. The colors have faded from the marker and because someone has not reset the nails, the tree is "eating" the marker. If someone is using markers on trees, they need to leave about an inch of space between the marker and the tree, and then reset the nails about every five years to prevent this from happening. |
Signs
West Rock has three kiosks or signboards that were installed by the state: inside the main entrance on Wintergreen Avenue, at the Lake Wintergreen parking lot, and at the Hill Street parking lot.
I installed wooden signs provided by CFPA at the starting and ending points for the Blue-Blazed Trails at West Rock: Regicides Trail, Sanford Feeder, and Westville Feeder, and along other parts of the Regicides Trail. I also installed a small signboard with a map at the junction of the Quinnipiac and Regicides Trail. Solar Youth installed signs at each end of its trail. There are no other signs at West Rock.
Some trail systems will have signs at trail junctions to indicate where people are going, and the distance to that point of interest. The challenge with trail signs is that they are typically wood, which means they need to be replaced as they rot. The other challenge is that they can become a target for vandals, who will write on them, or damage/destroy them just for kicks. Anything stapled to a signboard is at risk of being stolen, particularly when someone sees a trail map of the area that they want to use. If someone has a map, they should be able to navigate the trail system at West Rock without confusion.
 |
| The
junction of the Sanford Feeder Trail with the Regicides Trail shows
three types of trail markings. The Sanford Feeder is marked with
Blue-Red blazes and the blazes are turned sideways because this is the
end of that particular trail. The Regicides Trail has two blazes that
are offset, indicating the trail turns right at this location. The sign
indicates the Sanford Feeder Trail goes left. A sign for the Regicides
Trail is posted on a tree about 100 feet to the right of this junction
where the Regicides Trail turns left to continue north to York Mountain
and the Quinnipiac Trail. |
The Red Trail south of the main entrance at West Rock has drainage ditches that collect the water as it comes down the slope of the ridge, and then directs that water into culverts to carry it under the trail. These were installed by the city of New Haven when West Rock was a city park. Over the years the drainage ditches and culverts have filled, so water runs onto the trail and sits there. This project has been on my wish list for years.
Another option is to simply move the trail to higher ground, away from the low area where the water collects. This requires careful study to make sure the trail is being moved to a dry location. I did this in two sections of the White Trail north of the Purple Trail.
Constructing wooden boardwalks and bridges is something that should be done only if there are no other options. The price of the wood and deck screws for even a simple bridge can be $200 or more, and the bridge will need to be replaced when the wood rots away in about 20 years.
Plastic lumber can be used for the decking, as it will not rot, but the supports still need to be wood. However, plastic lumber is much more expensive than wood.
The northern section of the White Trail has a boardwalk section in an area that is soggy year-round.
 |
The White Trail north of Lake Wintergreen is frequently muddy in this area, so I placed down these stepping stones to give people a firm, dry area for walking. Water tends to collect in the dirt to the left, and the line of rocks across the trail directs it off-trail to the right, rather than running down the trail and eroding it. |
 |
| This winter photo shows the benefit of these stepping stones. |
Tools and Equipment
I use the following tools and equipment when I do my trail work:
I wear long sleeves shirts and pants to protect my arms and legs from thorns and ticks. I wear my waterproof hiking boots for support and protection. I tuck my pants into my socks to reduce the likelihood of ticks getting onto my skin. For additional tick protection, I wear The Tick Suit, and use Lymeez Tick Gaiters
I use thick work gloves to protect my hands. I wear a hat to keep the sun out of my eyes, and sawdust from getting into my hair and eyes when I am cutting things over my head with a handsaw.
I drink plenty of water as I am working, and take breaks to eat to maintain my energy level. Accidents are more likely to happen when someone is tired.
Long-handled loppers: Loppers are useful for cutting branches and vines up to about an inch in diameter. I prefer lightweight ones because they are easier to carry and less tiring to use. Some people use heavy duty ones with a mechanism to increase the force of the cut, but I find these too heavy.
Hand pruners: When I am blazing trails and sometimes when I am hiking, I use hand pruners, which are small and portable, and good for nipping off small branches that stick out over the trail.
Pruning saw: I have different pruning saws that I use to cut branches and vines larger than one inch in diameter. I have a folding saw that I keep in my pack when I am hiking in case I need to clear branches that have fallen on the trail. I have a larger fixed saw that I use for cutting larger branches (greater than six inches in diameter).
Some people will use a bow saw, but I quickly learned not to use this tool because it binds very easily when cutting wood. Binding is when the wood presses on the saw blade, pinching it tightly so the saw gets stuck. Any saw can bind, but bow saws are particularly likely to bind. Bow saws are also limited in the diameter of the tree they can cut because they have a top part.
I carry these in a five-gallon plastic bucket, which has a comfortable handle, and is also good for holding trash. Plastic bags are not useful in the woods for several reasons. They easily snag and tear on branches. If there is any liquid in the bottles and cans in the woods (a common situation), it will leak out into the bag and onto the person using it. Bags are easily torn by broken glass. A better portable option is a reusable grocery bag, which resists tears, but leaks and gets dirty from trash.
A chainsaw is used to clear large trees (wider than nine inches in diameter) that have fallen on the trail. I will clear some of these with my larger handsaws, but it can easily take an hour or more with the needed rest breaks to give my arms a rest and to catch my breath.
For my first 15 years of trail work, I avoided chainsaws, due to the danger. Then I bought a small electric chainsaw to use on smaller limbs. When I need a large blowdown cleared, I seek assistance from volunteers who have larger chainsaws and the proper training to clear fallen trees. At times I will contact the state to have one of its workers to clear the tree, but since they have almost no staff, it can take weeks or months for something to be cleared from a trail. The state will quickly clear blowdowns on the park’s paved roads.
I sometimes use a rake, which I will use to clear leaves away from inside and around a culvert. I rake leaves away that are acting as a dam to keep water from draining off a trail. Some sections of trail collect deep piles of leaves, depending on how water flows and how the wind blows. I rake these piles off the trail because they are a slipping hazard. I also rake leaves that pile up on rocky sections of trail because they too are a slipping hazard. Raking away leaves to bare dirt is not recommended because it increases trail erosion. Instead, on dirt, I leave a thin layer of leaves to deflect the raindrops as they hit the ground. It is useful to have a regular-sized rake for most jobs, and a narrow rake with a six-inch wide head for culverts and other smaller jobs.
Goggles are an important safety tool to protect the eyes.
 |
This picture shows my basic tools for trail pruning: a quality pruning saw and inexpensive loppers that I carry in a plastic bucket. I used the saw to clear this tree. |
Blazing Tools and Equipment
I use latex paint for painting my blazes. I look for the “Oops” paint at Home Depot, which is about $12 a gallon as compared to $50 for a regular gallon of paint. Oops paint is where someone requests a color and it does not come out the way they wanted it to look. I sometimes will buy a quart of paint for the shorter trail colors, which is typically about $20. I rarely find colors like orange and yellow in oops paint. CFPA supplies me with blue paint for its trails.
I put the paint into small plastic jars with lids (like a peanut butter jar) to carry onto the trail. A pint of paint can easily last for a mile of trail.
I use cheap 1.5-inch wide paint brushes that typically cost about a dollar. This is the best width because when used on a tree, it widens out to create a 2-inch wide blaze.
I carry both a wire brush and a nylon brush to scrape dirt, and lichens and other growth off trees and rocks. I use the wire brush on rocks and trees with rough bark. I use the wire brush on trees with smooth bark. I only scrape off what I need to remove. I do not wish to damage the bark.
Some people use a template to create a perfect-shaped blaze. I do not because it requires three hands: one to hold the template, one to hold the paintbrush, and one to hold the paint jar. Trees are not flat surfaces, which is another challenge in using templates. I find that I also get drips and runs with templates. With years of experience, my blazes are close to the correct size and shape.
I sometimes use a greenish-gray paint mix that I create to paint over old blazes where those old blazes may cause people confusion. When possible, I leave the old blazes alone to simply fade. Painting over them means they will eventually reappear as the top paint wears away. If I do paint over a blaze, I paint a random pattern, so it does not look like a blaze. Too often I see people carefully paint over old blazes with black or brown paint, and it is very obvious there was once a blaze on the tree. This is particularly important NOT to do when moving a trail because it confuses hikers.
Digging Tools
Connecticut’s rocky soil is often challenging for digging, and the soil at West Rock fits that category with many rocks held together by hard-packed soil.
The pick mattock is the basic tool for digging. It has two blades, usually one wide and one pointy. It can also be used as a lever to move rocks. Wear goggles when using the pick mattock because it can shatter rock when digging.
The shovel is used for moving dirt after the pick mattock has loosened it. Shovels have either flat edge or a pointed tip. The pointed tip shovel is generally more useful because it can dig into a pile of dirt, wood chips, gravel, etc.
Plastic buckets and a hand truck, or a wheelbarrow can be used to move dirt.
There are other digging tools, but these are the most common ones.
Trash and Graffiti
Trash and graffiti are two problems caused by people at West Rock. They take away from the enjoyment of those using the park, and give them the idea that the park is not cared for.
People dump large items along Wintergreen Avenue, such as sofas, TVs and mattresses. They toss bottles, cans and wrappers in different locations: along the park border, and in parking areas at the South Overlook, Judges Cave, Lake Wintergreen, and Hill Street. People will often toss these into the weeds near the parking areas, as if that somehow is better than leaving it where it could be more easily picked up. Litter collection is a great project for any group.
People paint graffiti on rocks, guard rails, road surfaces, and stone walls. This graffiti can be painted over to hide it.
 |
| This is trash I removed from the weeds next to the Hill Street parking lot, and took home for proper disposal. Litterbugs somehow think that tossing their bottles, cans and wrappers into the weeds is better than simply leaving it in the parking lot. Either way, they are taking away from the natural beauty of the park. People should be responsible and take their trash with them, so others do not have to look at it. |
Invasive Plants
A major focus of my work at West Rock is removing invasive plant species. Invasive plants are plants that are not native to the area and were typically brought here by someone traveling to another area of the world. That person saw this plant growing somewhere else and thought it would be a good plant for their garden, or another use. Once planted here, the non-native plants spread through their seeds, and into the woods.
Invasive plants typically share these characteristics: they can grow in poor soil where native plants may not grow. They produce lots of seeds, which allow them to spread rapidly. In the spring, their leaves come out before the native plants, and in the fall, they keep them longer than the native plants, meaning they can grow for a longer period of time. They are hard to kill. Even when cut to the ground, they grow back. They grow much faster than native plants and can form dense thickets of just that plant. If that plant has sharp thorns like multi-flora rose, it can scratch up a trail user’s skin and clothing.
From a trail maintenance point of view, they are challenging because they grow fast and can typically take over an area.
If the smaller ones can be pulled out, this is best approach because once uprooted, that particular plant is dead. The larger ones need to be cut over and over until they die. The challenge is getting back to a particular area often enough to do this. Most areas will need repeated visits due to the seeds in the ground that will continue to sprout until none are left.
An important thing to keep in mind when pulling and cutting invasive plants is that there are often native plants growing near and under the invasive plants. It is important to leave these native plants alone because these are what we want to grow in the woods. Also, if everything is removed from an area, the invasive plants will come back first and will come back more strongly than the native plants.
When I teach people about invasive plant removal, I tell them that if they are not absolutely sure what they are cutting or pulling to leave it alone. It is better to leave an invasive in place that I can come along later and cut or pull, than to remove a native plant that I cannot replant if removed by mistake.
If the invasive plant has any berries, I place it down exactly where I cut it because I do not want to spread the berries any further by tossing it into the woods. Sometimes I will collect some of the berries and put them out with the trash, to reduce the number of seeds in the woods.
Invasive plants are located across West Rock. The worst area is the Teal Trail between the Red Trail and Amrhyn Field where many of the invasive plants listed below are growing over a large area. I have completed several work parties over a few years on this trail putting in more than 300 hours of work, and we have only made a dent.
These are common invasive plants at West Rock. This is not a full list, and also does not include invasive plants that are in Connecticut, but I have not seen at West Rock.
This website gives information about many of the invasive plants on my list and why they are so bad for the woods.
https://www.epicgardening.com/invasive-species-sold-at-garden-centers/
The information below is a quick overview of the most common invasive plants. This page on my West Rock website has plenty of photos and information on invasive plants:
https://westrocktrails.blogspot.com/p/invasive-species-and-problems-they.html
Vines
Asiatic bittersweet is a tan vine that wraps around trees and strangles them, which kills them. They have an orange root and in the fall they have bright red berries. Smaller vines (less than one inch in diameter) can be pulled out of the ground. Larger ones need to be cut. I tell people to cut them as low as they can and as high as they can so they slow down how fast they regrow.
Japanese honeysuckle is a thin vine that is thread-like when young and looks like tan twine when it gets older. This vine twists around trees and shrubs and creates dense mats along the ground. This is a challenge to remove because it grows in all directs and the vines often break when pulled.
Native vines include grape vines, which I leave alone, and poison ivy, which I only cut when it is on the trail. Grape vines have a dark brown bark and they hang from trees, not wrapping around the bark like the invasive vines. In the fall, they may have concord grapes, which are ripe when they are purple (not when they are green). Poison ivy grows up the side of a tree and has a hairy appearance, which is the root of the vine. These need to be handled very carefully because the oil from the plant causes a rash in most people.
 |
Invasive privet lines the Red Trail as it approaches the South Overlook. Even when cut to the ground, this invasive plant will quickly grow back. |
Shrubs
Multi-flora rose is a pricker bush with sharp thorns that can scratch deeply. This plant grows quickly and has small white flowers in the spring and red berries in the fall. Cutting these takes time because the multi-flora rose grows in all directions, and trail workers have to handle the stems (called canes) carefully because the thorns are so sharp.
Multi-flora rose is easily confused with native blackberry, raspberry, and black raspberry, plants that are desirable. The difference is that multi-flora rose has a circular stem that may be reddish or green, and multiple canes sprout from a center root. Blackberry has a purple stem that has sharp angles, and raspberry has a purple stem that is waxy, while raspberry has a green stem. The native berries have individual canes located near other individual canes.
Wineberry is an invasive raspberry that is easily recognized because it has reddish-purple short hairs around its canes.
Winged euonymus (commonly known as burning bush) can be recognized by its cork-like wings that grow along the branches and its diamond-shaped leaves. In the fall it has small red berries and bright red leaves. As a result of the leaf color, it is a popular landscaping plant. This is easily confused with native high bush blueberry, which has a similar shaped leaf, but does not have the corky wings and its leaves are a pale red in the fall.
Japanese barberry is a shrub with needle-like thorns and produces bright red berries in the fall. When cut the inside of its branches and roots are yellow. Barberry is a preferred habitat of deer ticks, so areas that have more barberry have more deer ticks, and people going through that area have a greater chance of getting bit and getting Lyme disease. West Rock does not have much barberry; most of it is located along Baldwin Drive.
Autumn olive is a shrub that can grow to 15 feet in height. It can be recognized by its leaves that are long and narrow and have a medium green color on top, and a silvery green color on the bottom. In the fall, it may produce round, purple-red berries, which can be eaten.
Privet is a shrub that people plant in their yards to make a hedge. It has oval-shaped leaves and produces black-colored berries in the fall.
Other Invasives
Japanese knotweed looks a bit like bamboo because it has ribs about every six inches on the plant, and grows to about eight feet tall. It has heart-shaped leaves and in the fall, it grows white flowers that are long and narrow. Knotweed is extremely difficult to kill because when cut or pulled up, it grows back from the roots in the ground.
Mugwort is a weed with medium green leaves that grows to about six feet tall. When the leaves are crushed, they have a spicy smell to them. Mugwort will grow in large patches. Pulling it out of the ground can control it. New mugwort will grow from the seeds in the ground, so this is not a one-time project.
Tree of heaven is native to China and is the preferred habitat for the spotted lanternfly, a destructive insect that has arrived in Connecticut. When mature, the tree has a light-colored bark with a texture that resembles a cantaloupe. The branches are concentrated at the top of its straight trunk. Its narrow, pointy leaves give it a tropical look. When cut and thankfully the wood is easy to cut, the tree gives off a disgusting, choking smell that lingers in the air.
The tree of heaven is similar to the native staghorn sumac, but the sumac has the appearance of a shrub with branches that grow in many directions. The sumac’s upper branches have a fuzzy coating to them, which is where the name staghorn originates. The sumac leaves are serrated, while the tree of heaven leaves are smooth with a bump out near the base. The sumac leaves turn a brilliant red in the fall, while tree of heaven leaves turn yellow. Finally, the staghorn sumac will grow a fruit that is bright red and roughly the size and shape of a pinecone. This invasive will also resprout vigorously when cut, making mechanical control a challenge.
Resources
This trail maintenance overview discusses WHAT to do, but it does not describe in necessary detail HOW to perform these tasks. The following resources go into detail on the topics that I briefly reviewed in this overview guide.
The U.S. Forest Service publishes the Trail Construction and Maintenance Notebook, which can be downloaded for free. Do an Internet search for this by name. I stopped providing a link for it because the link has changed over time.
The Appalachian Mountain Club publishes the following book: AMC’s Complete Guide to Trail Building & Maintenance, written by the Staff of AMC’s Trails Department.
The best training would be for an adult associated with Solar Youth to attend training and a work session offered by an outdoors organization. Training is usually low cost to free.
The AMC hosts the Give a Day to the Trails in May every year on the Appalachian Trail. The event starts with a brief overview and focuses on actual work on the trails.
Website: http://www.ct-amc.org/trails/index.shtm
CFPA hosts trail workshops on a variety of topics, and hosts an annual trails workshop in the spring at its headquarters in Middlefield. Website: https://www.ctwoodlands.org/
I schedule trail maintenance events on a very irregular basis, typically one Saturday a month from 9 a.m. to 12 p.m. between November and April. I email my work parties to people who have told me they are interested, and often list them on the AMC website as well. I volunteer throughout the year at the park as my schedule allows.
An insightful breakdown of what keeps our trails safe and accessible! This blog highlights the often-overlooked work behind trail upkeep and why it’s vital for preserving nature and ensuring enjoyable outdoor experiences. Great read!
ReplyDeleteGarden Soil Liberty Hill